INTRODUCTION TO SPSS
SPSS is a software package used for
conducting statistical analyses, manipulating data, and generating tables and
graphs that summarize data. Statistical analyses range from basic descriptive
statistics, such as averages and frequencies, to advanced inferential
statistics, such as regression models, analysis of variance, and factor
analysis. SPSS also contains several tools for manipulating data, including
functions for recoding data and computing new variables, as well as for merging
and aggregating datasets. SPSS also has a number of ways to summarize and
display data in the form of tables and graphs. There are various versions of
SPSS ranging from version 16,17,18,19,20,21 and version 22 which is the latest
version of SPSS but this tutorial is based primarily on version 20 of SPSS (at
least in terms of the diagrams); however, don’t be fooled too much by version
numbers because SPSS has a habit of releasing ‘new’ versions fairly regularly. There
are few differences in these new releases that most of us would actually
notice.
HOW TO INSTALL SPSS
Step 1: Get the raw file of SPSS
Step 2: Copy the raw file into a folder
and name it SPSS.
Step 3: Open the SPSS folder as shown
in fig. 2
Step 4: Open the SPSS 20 folder inside
the SPSS folder as shown in fig. 3
Step 5: Run the setup.part1 as
administrator
Step 6: Fig. 4 will display and click
install
Step 7: After clicking install fig. 5 will display.
Step 8: After fig. 5 finish loading it
will display fig. 6
Step 9: In fig. 6 click 'I accept the terms' then click 'Next'.
Step 10: Fig. 7 will display click next
Step 11: Fig. 8 will be display, then
click next
Step 12: Fig. 9 will be display, then
click install
Step 13: Fig. 10 will be display then click Next it will display fig. 11
Step 14:In fig. 11 click Install, fig. 12 and Fig. 13 will be displayed showing the installation progress
Step 15: Fig. 14 will be displayed then click ok.
Step 16:Fig. 15 will be display to activate the SPSS click next then fig. 16 will be displayed
Step 17: Go to the SPSS 20 sub-folder
inside the SPSS folder as shown in fig. 17
Step 18: Copy and paste it inside
the ‘enter code’ column as shown in fig. 16 then click next.
Step 19: Then fig. 19 will display,
then click Next.
Step 20: Then fig. 20 will be display,
then click ok
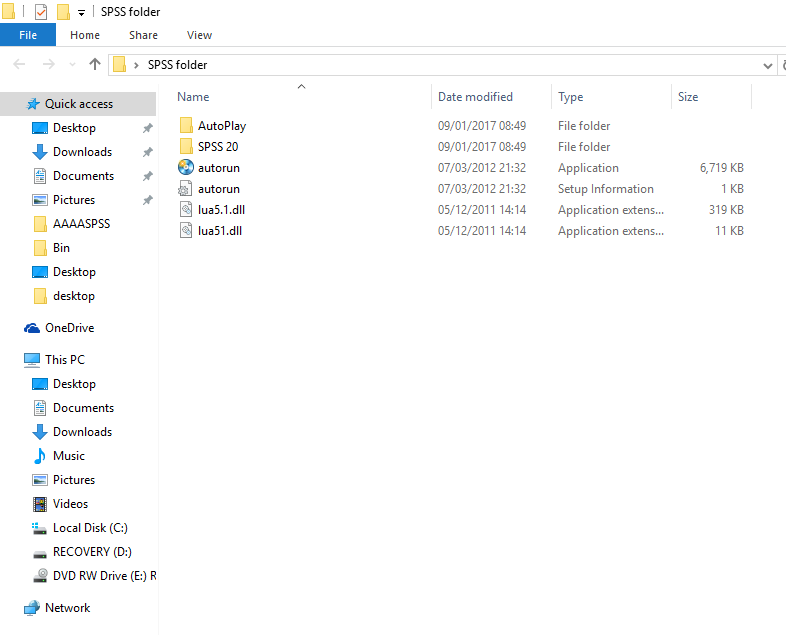
Fig. 2:

Fig. 3

Fig. 4

Fig. 5

Fig. 6:

Fig. 7

Fig. 8

Fig. 9

Fig. 10

Fig. 11

Fig. 12

Fig. 13

Fig. 14

Fig. 15

Fig. 16

Fig. 17
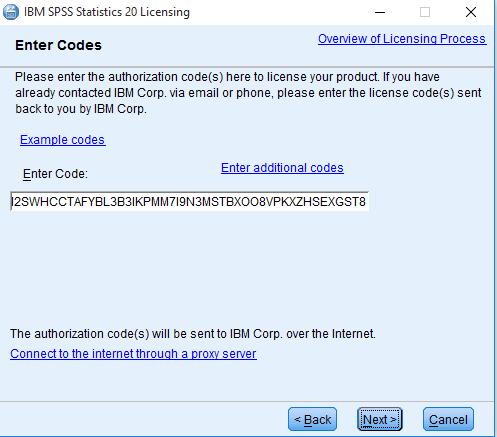
Fig. 18
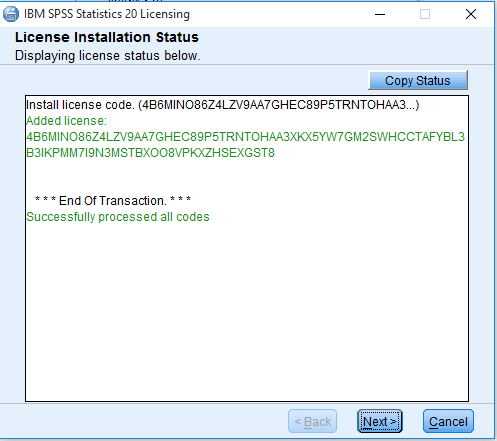
Fig. 19

Fig. 20
Congratulation, you have successfully installed SPSS. Therefore, enjoy yourself!!!!watch out for module 2 tomorrow ( 10th of January 2017) .
Feel free to ask any questions. pls make good use of the comment box. you can also contact me via:
Email: abataysoftwarewizard@gmail.com
phone no: 08130582034
No comments:
Post a Comment